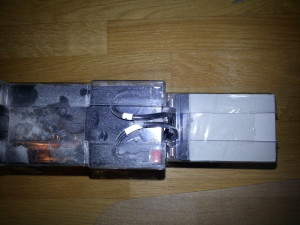
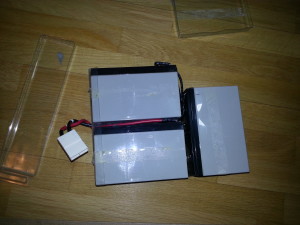
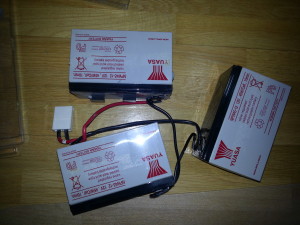
BIOS update on ZTSystem JASPER12 / Inventech B810 / A9DRPF-10S

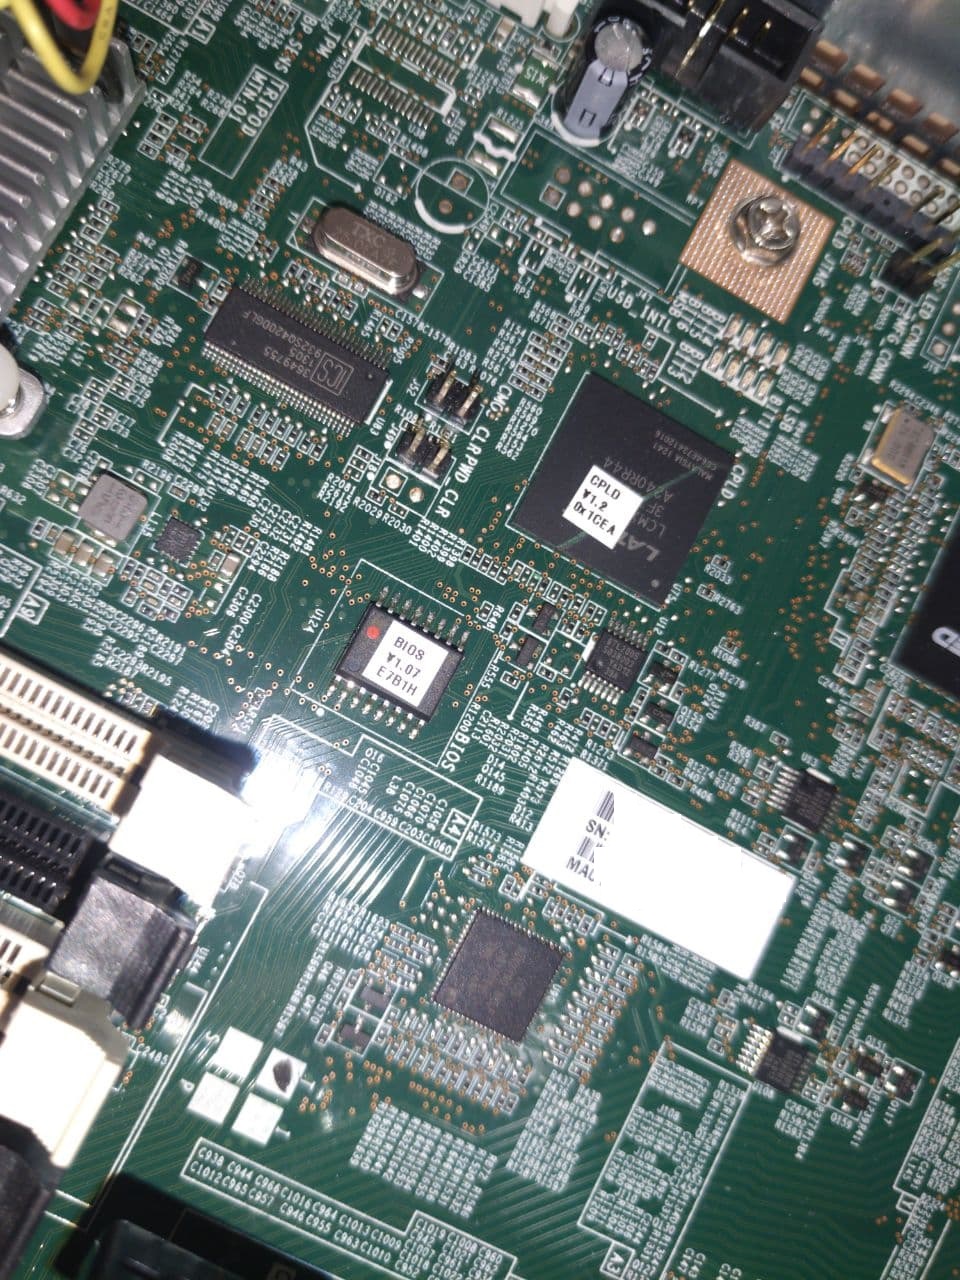
Using Xeon E5-26xx v2 CPUs in this server requires a BIOS update.
Updating using AFUDOS does not work (and will brick your server).
Requirements for update:
*) Server to upgrade
*) CH341A BIOS programmer
*) Hot air station
*) Soldering iron
*) New BIOS file.

First get the BIOS update file `B810Update.7z` linked to from this forum thread: https://forum.ixbt.com/topic.cgi?id=66:12091:13#13 .

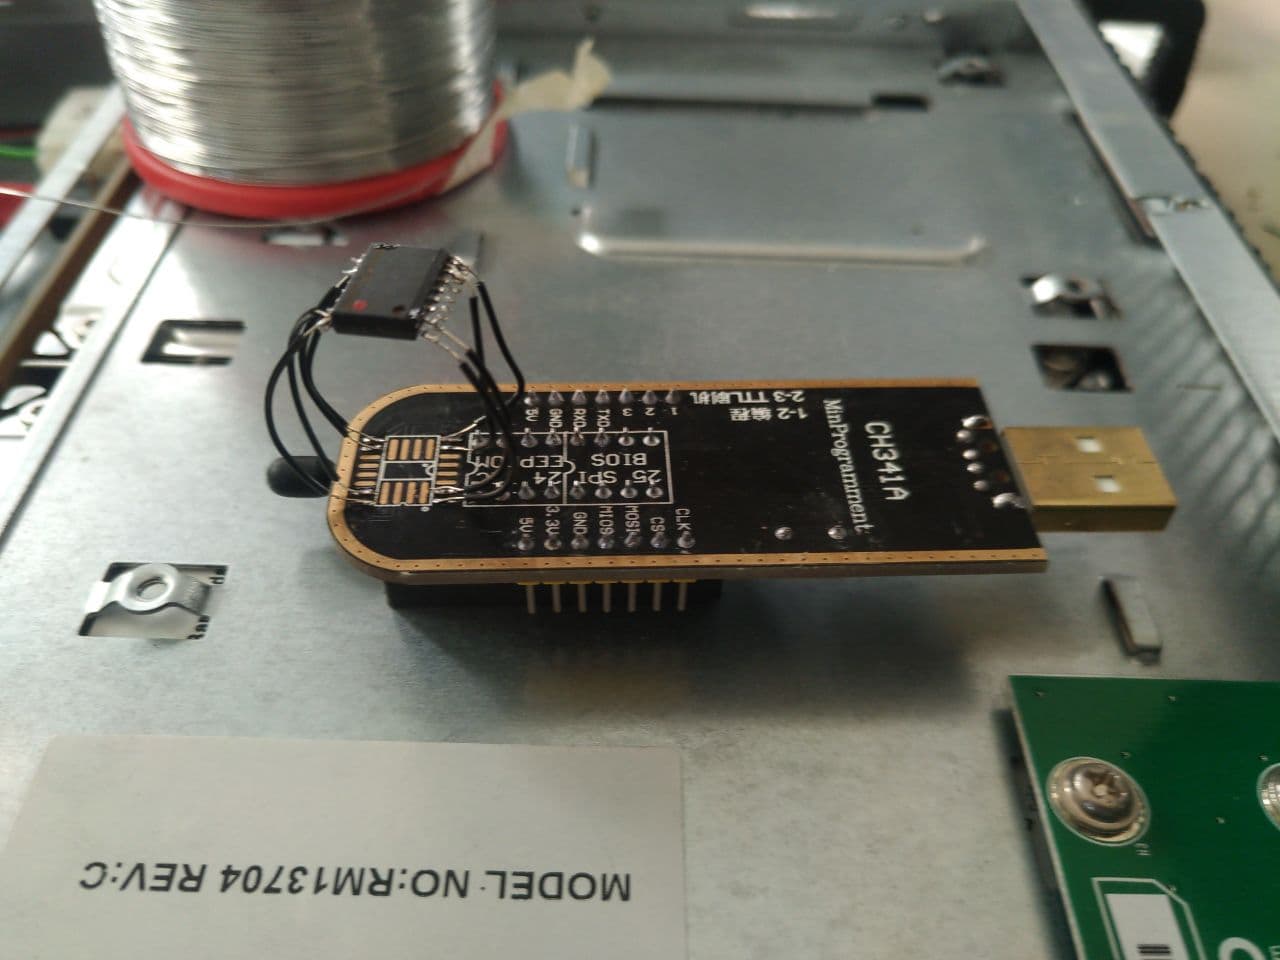
Then open the server and use the hot air station to remove the BIOS flash chip.

When you have removed the chip solder it to the CH341A programmer:

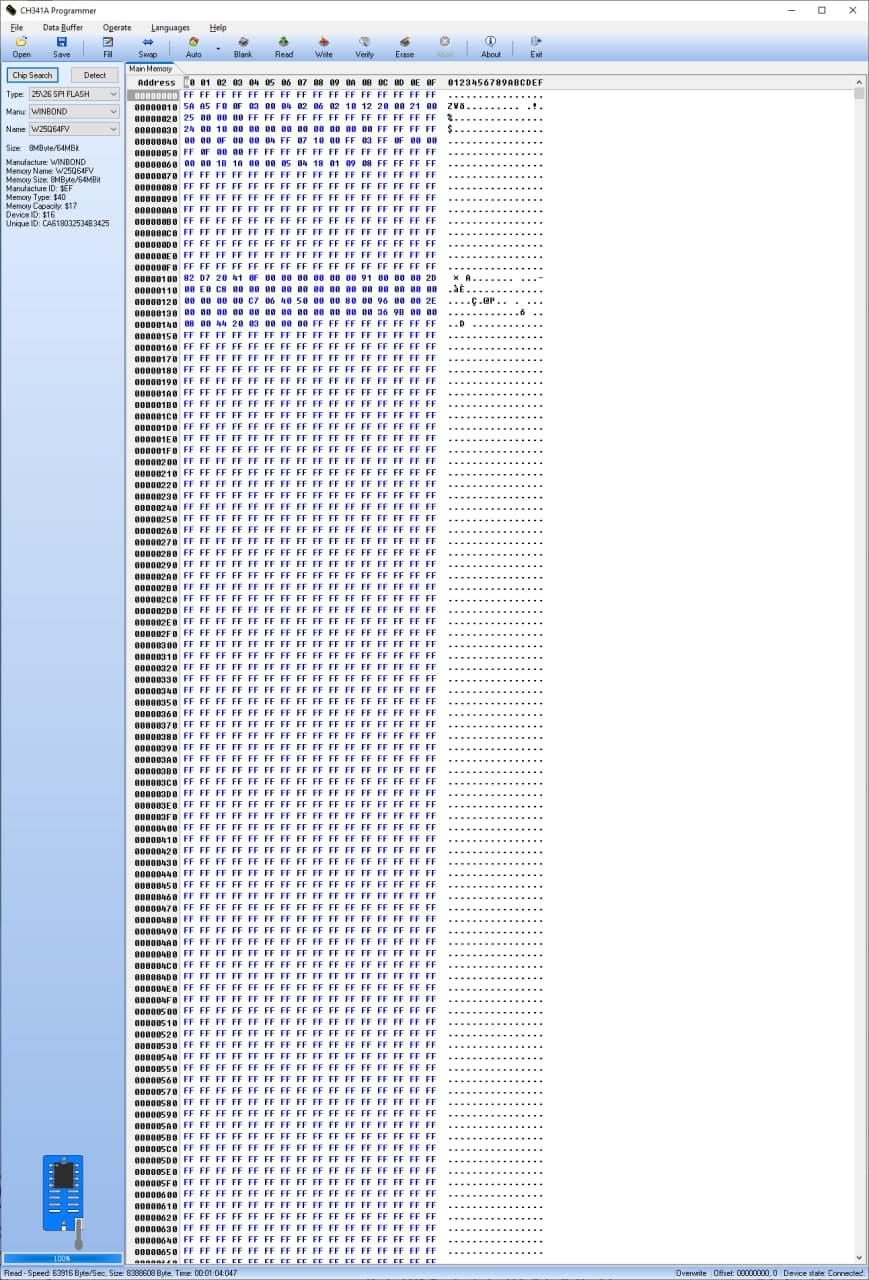
Connect programmer to computer and install driver from CH341PAR.ZIP.
Run programmer software.

First it’s a good idea to read the existing data from the chip and save it, so that you have a backup in case the new bios doesn’t work on your specific server.
Then load the new bios file and write it to the chip.
After that you can solder the chip back in the server and try booting.

Debian Linux firewall with multiple external IPs through DHCP

Requirements:

  • Debian Linux
  • Multiple network interfaces connected to WAN (for example using a switch, might also be possible using bridge and dummy interfaces in Linux)
  • ISP that gives multiple IPs via DHCP

Configure the interfaces

File: /etc/network/interfaces , change the interface names to match yours.

# The loopback network interface
auto lo
iface lo inet loopback

# LAN Interface
allow-hotplug ens3
iface ens3 inet static
        address 172.16.1.1
        netmask 255.255.255.0
        up /sbin/ip rule add 172.16.1.0/24 dev $IFACE table 10
        up /sbin/ip rule add 172.16.1.0/24 dev $IFACE table 11


# WAN Interface 1
allow-hotplug ens5
iface ens5 inet manual
        up /sbin/dhclient -4 -v -pf /run/dhclient.$IFACE.pid -lf /var/lib/dhcp/dhclient.$IFACE.leases -I -df /var/lib/dhcp/dhclient6.$IFACE.leases $IFACE
        down /bin/kill $(cat /run/dhclient.$IFACE.pid)

# WAN Inetrface 2
allow-hotplug ens9
iface ens9 inet manual
        up /sbin/dhclient -4 -v -pf /run/dhclient.$IFACE.pid -lf /var/lib/dhcp/dhclient.$IFACE.leases -I -df /var/lib/dhcp/dhclient6.$IFACE.leases $IFACE
        down /bin/kill $(cat /run/dhclient.$IFACE.pid)

# WAN Interface 3
allow-hotplug ens10
iface ens10 inet manual
        up /sbin/dhclient -4 -v -pf /run/dhclient.$IFACE.pid -lf /var/lib/dhcp/dhclient.$IFACE.leases -I -df /var/lib/dhcp/dhclient6.$IFACE.leases $IFACE
        down /bin/kill $(cat /run/dhclient.$IFACE.pid)

Configure dhclient enter hooks to use multiple routing tables

File: /etc/dhcp/dhclient-enter-hooks.d/routing-tables , change the interface names to match yours.

RUN="yes"

if [ "$RUN" = "yes" ]; then
        if [ "$interface" = "ens5" ]; then
                echo "Main wan interface, not doing anything special" >> /tmp/dhclient-routing-tables.log
        else
                table=""
                if [ "$interface" = "ens9" ]; then
                        table="10"
                elif [ "$interface" = "ens10" ]; then
                        table="11"
                fi
                echo "Routing table $table" >> /tmp/dhclient-script.debug

                if [ -n $table ]; then
                        if [ x$reason = xBOUND ] || [ x$reason = xRENEW ] || \
                                [ x$reason = xREBIND ] || [ x$reason = xREBOOT ]; then
                                if [ x$new_routers != x ] && [ x$new_routers != x$old_routers ]; then
                                        for router in $old_routers; do
                                                echo "Removing default $router table $table" >> /tmp/dhclient-routing-tables.log
                                                /sbin/ip route delete $router dev $interface table $table
                                                /sbin/ip route delete default via $router dev $interface table $table
                                        done

                                        for router in $new_routers; do
                                                echo "Adding default $router table $table" >> /tmp/dhclient-routing-tables.log
                                                /sbin/ip route add $router dev $interface table $table
                                                /sbin/ip route add default via $router dev $interface table $table
                                        done
                                fi

                                if [ x$new_ip_address != x$old_ip_address ]; then
                                        echo "ip rule add from $new_ip_address table $table" >> /tmp/dhclient-routing-tables.log
                                        /sbin/ip rule del from $old_ip_address table $table
                                        /sbin/ip rule add from $new_ip_address table $table
                                fi
                        fi
                fi
                new_routers=""
                old_routers=""
        fi
fi

Automatically update firewall when dhclient runs

File: /etc/dhcp/dhclient-exit-hooks.d/firewall

# Reload firewall in case ip has changed or such
RUN="yes"

if [ "$RUN" = "yes" ]; then
        /etc/firewall.sh
fi

Configure the NAT and firewall

File: /etc/firewall.sh

#!/bin/bash

LAN_IF="ens3"
WAN_INTERFACE="ens5"
WAN2_INTERFACE="ens9"
WAN2_IP=$(ip addr show dev $WAN2_INTERFACE | grep 'inet ' |awk '{print $2}' | cut -f1 -d'/')
WAN3_INTERFACE="ens10"
WAN3_IP=$(ip addr show dev $WAN3_INTERFACE | grep 'inet ' |awk '{print $2}' | cut -f1 -d'/')

# Configure routing tables
ip rule delete fwmark 10 table 10
ip rule add fwmark 10 table 10
ip rule delete fwmark 11 table 11
ip rule add fwmark 11 table 11

ip route add 172.16.1.0/24 dev ens3 table 10
ip route add 172.16.1.0/24 dev ens3 table 11

# Configure firewall
iptables -F
iptables -F -t nat
iptables -F -t mangle
ip6tables -F

# Allow ICMP
iptables -A INPUT -p icmp -j ACCEPT
iptables -A FORWARD -p icmp -j ACCEPT
ip6tables -t filter -A INPUT -p icmpv6 -j ACCEPT
ip6tables -t filter -A FORWARD -p icmpv6 -j ACCEPT

# Allow SSH
iptables -A INPUT -p tcp --dport 22 -j ACCEPT
ip6tables -A INPUT -p tcp --dport 22 -j ACCEPT

# Allow localhost
iptables -I INPUT -i lo -s 127.0.0.0/8 -d 127.0.0.0/8 -j ACCEPT
ip6tables -I INPUT -i lo -s ::1 -d ::1 -j ACCEPT

# Allow state
iptables -A INPUT -m state --state RELATED,ESTABLISHED -j ACCEPT
iptables -A FORWARD -m state --state RELATED,ESTABLISHED -j ACCEPT

# NAT Postrouting

# Allow to all from lan
iptables -A FORWARD -i $LAN_IF -o $WAN_INTERFACE -s 172.16.1.0/24 -j ACCEPT
iptables -A FORWARD -i $LAN_IF -o $WAN2_INTERFACE -s 172.16.1.10 -j ACCEPT
iptables -A FORWARD -i $LAN_IF -o $WAN3_INTERFACE -s 172.16.1.20 -j ACCEPT

# Special mangle for multiple routing tables
iptables -t mangle -A PREROUTING -j CONNMARK --restore-mark
iptables -t mangle -A PREROUTING -m mark ! --mark 0 -j RETURN # return if already set
iptables -t mangle -A PREROUTING -i $WAN2_INTERFACE -j MARK --set-mark 10
iptables -t mangle -A PREROUTING -i $WAN3_INTERFACE -j MARK --set-mark 11

iptables -t mangle -A POSTROUTING -o $WAN2_INTERFACE -j MARK --set-mark 10
iptables -t mangle -A POSTROUTING -o $WAN3_INTERFACE -j MARK --set-mark 11
iptables -t mangle -A POSTROUTING -j CONNMARK --save-mark


# HTTP/HTTPS on WAN2 to webserver
iptables -t nat -A PREROUTING -i $WAN2_INTERFACE -p tcp --dport 80 -j DNAT --to 172.16.1.11:80
iptables -t nat -A PREROUTING -i $WAN2_INTERFACE -p tcp --dport 443 -j DNAT --to 172.16.1.11:443
iptables -A FORWARD -p tcp --dport 80 -d 172.16.1.11 -j ACCEPT
iptables -A FORWARD -p tcp --dport 443 -d 172.16.1.11 -j ACCEPT

# Rest of WAN2 to 172.16.1.10
iptables -t nat -A POSTROUTING -o $WAN2_INTERFACE -s 172.16.1.10 -j SNAT --to-source $WAN2_IP
iptables -t nat -A PREROUTING -i $WAN2_INTERFACE -j DNAT --to-destination 172.16.1.10
iptables -t mangle -A PREROUTING -s 172.16.1.10 -j MARK --set-mark 10

# 1:1 NAT for WAN3
iptables -t nat -A POSTROUTING -o $WAN3_INTERFACE -s 172.16.1.20 -j SNAT --to-source $UWAN3_IP
iptables -t nat -A PREROUTING -i $WAN3_INTERFACE -j DNAT --to-destination 172.16.1.20
iptables -t mangle -A PREROUTING -s 172.16.1.20 -j MARK --set-mark 11
iptables -A FORWARD -p tcp --dport 22 -d 172.16.1.20 -j ACCEPT

# Masquerading
iptables -t nat -A POSTROUTING -s 172.16.1.0/24 -j MASQUERADE

# Log the rest
iptables -t filter -A INPUT -j LOG
ip6tables -t filter -A INPUT -j LOG
iptables -A FORWARD -j LOG
ip6tables -A FORWARD -j LOG

# Default drop
iptables -P INPUT DROP
iptables -P FORWARD DROP
ip6tables -P INPUT DROP
ip6tables -P FORWARD DROP

Make script executable:

# chmod +x /etc/firewall.sh

Create systemd service for firewall

File: /etc/systemd/system/firewall.service

[Unit]
Description=Firewall
ConditionFileIsExecutable=/etc/firewall.sh

[Service]
Type=oneshot
ExecStart=/etc/firewall.sh

[Install]
WantedBy=basic.target

Enable service:

# systemctl enable firewall

Enable forwarding

File: /etc/sysctl.conf

net.ipv4.ip_forward=1
net.ipv4.conf.all.accept_redirects = 0
net.ipv6.conf.all.accept_redirects = 0
net.ipv4.conf.all.send_redirects = 0
net.ipv4.conf.all.accept_source_route = 0
net.ipv6.conf.all.accept_source_route = 0
net.ipv4.conf.all.arp_ignore = 1
net.ipv4.conf.all.arp_announce = 2

Completion

Reboot the system and verify functionality.

Digoo DG-M1Z IP Camera settings

Cheap IP camera with 1920×1080 resolution.

It does NOT have a web interface.
It can only be managed via ONVIF (python-onvif is useful for this, also ONVIF Device Manager).

Zoneminder settings:
General -> Source type = Ffmpeg
Source -> Source path: rtsp://admin:20160404@<ip>:554/onvif1
Source -> Remote Method: RTP/Unicast
Capture width: 1920
Capture height: 1080

There is smearing on the bottom part of the image about half the time.
Most people on the internet recommends switching to TCP to avoid smearing, but I have been unable to get this camera working over TCP.

Jumbo frames on Quanta LB6M

Enable jumbo frames for layer2 traffic:

(FASTPATH Routing) #config

(FASTPATH Routing) (Config)#interface 0/1-0/28

(FASTPATH Routing) (Interface 0/1-0/28)#mtu 9216

(FASTPATH Routing) (Interface 0/1-0/28)#exit

(FASTPATH Routing) (Config)#exit

Enable jumbo frames for routed traffic:

(FASTPATH Routing) #show ip interface brief

Interface    State  IP Address      IP Mask         Method
----------   -----  --------------- --------------- -------
2/1          Up     130.240.207.3   255.255.255.0   Manual

(FASTPATH Routing) (Config)#interface 2/1

(FASTPATH Routing) (Interface 2/1)#ip mtu 9198

Remember to save your config:

(FASTPATH Routing) #write mem

This operation may take a few minutes.
Management interfaces will not be available during this time.

Are you sure you want to save? (y/n) y

Config file 'startup-config' created successfully .

Configuration Saved!

Enabling IPMI using ipmiutil

ipmiutil is available for Linux, Windows, Solaris, Mac OSX, and FreeBSD and can be downloaded from: http://ipmiutil.sourceforge.net/

The following command will enable LAN access for IPMI on IP 10.1.2.3 with gateway 10.1.2.1, username admin and password Password

ipmiutil lan –e –I 10.1.2.3 -f 2 -G 10.1.2.1 –u admin –p Password


To set shared LAN on Dell servers (useful if the servers does not have a DRAC card):

ipmiutil delloem lan set shared


Migrate live system from single disk to LVM on RAID 1 (on Debian Jessie)

This assumes that the two drives are /dev/sda and /dev/sdb.
Where /dev/sda is the existing drive and /dev/sdb is the new drive,
and that the system partition is sda1/sdb1.

Copy the partition table from /dev/sda to /dev/sdb

sfdisk -d /dev/sda | sfdisk --force /dev/sdb


Set the filesystem type to “fd” (Linux raid autodetect)

sfdisk --change-id /dev/sdb 1 fd


Zero the superblock to make sure that mdadm will not detect an existing volume

mdadm --zero-superblock /dev/sdb1


Create the RAID 1 with the new disk only

mdadm --create /dev/md0 --level=1 --raid-disks=2 missing /dev/sdb1


Add the raid to mdadm.conf so that it will be configured automatically on boot

mdadm --examine --scan >> /etc/mdadm/mdadm.conf


Create the physical volume on the new raid volume

pvcreate /dev/md0


Create a volume group on the new physical volume

vgcreate vg_hostname /dev/md0


Create a logical volume on then new volume group

lvcreate -L 100G -n root vg_hostname


Create an ext4 filesystem on the logical volume

mkfs.ext4 /dev/vg_hostname/root


Mount the new filesystem

mount /dev/vg_hostname/root /mnt


Copy the old system files

rsync -auxHAXSv --exclude=/dev/* --exclude=/proc/* --exclude=/sys/* --exclude=/tmp/* --exclude=/mnt/* --exclude=/afs/* / /mnt/


Modify /etc/fstab, the line for / should be

/dev/vg_hostname/root / ext4    errors=remount-ro 0       1


Create /etc/grub.d/09-lvm with contents:

#!/bin/sh
exec tail -n +3 $0

menyentry 'New system' --class gnu-linux --class gnu --class os {
    insmod part_msdos
    insmod diskfilter
    insmod mdraid1x
    insmod lvm
    insmod ext2
    set root='lvm/vg_hostname-root'
    linux /boot/vmlinuz-$(uname -r) root=/dev/mapper/vg_hostname-root ro
    initrd /boot/initrd.img-$(uname -r)
}


Add the following to /etc/default/grub:

GRUB_PRELOAD_MODULES="lvm"


Update the grub configuration files:

update-grub


Update the initramfs

update-initramfs -c -k $(uname -r) -u


Reboot and it should now boot from the LVM volume

reboot

Verify that we have booted from the LVM volume

mount
# the output should contain the following
/dev/mapper/vg_hostname-root on / type ext4 (rw,relatime,errors=remount-ro,data=ordered)
  If everything is ok we can continue with adding the old drive to the raid. Change the partition type to Linux raid autodetect

sfdisk –change-id /dev/sda 1 fd 

Add the old drive to the raid:

mdadm --add /dev/md0 /dev/sda1


Update grub config files and initramfs

update-grub
update-initramfs -c -k $(uname -r) -u


Install grub to the devices.

grub-install --recheck /dev/sda
grub-install --recheck /dev/sdb
 

L2TP/IPSEC on Cisco ASA

This is the configuration for L2TP/IPSEC on Cisco ASA.
This assumes that there is an aaa-server configured named ad_vpn for vpn users.
When using aaa-server protocol ldap then only pap is valid authentication type.
If you use radius authentication instead of ldap then ms-chap-v2 authentication can be enabled.

ip local pool vpnclient 172.16.20.100-172.16.20.120 mask 255.255.255.0

access-list vpnclient_splitTunnelAcl remark Internal
access-list vpnclient_splitTunnelAcl standard permit 192.168.45.0 255.255.255.0

group-policy vpnclient internal
group-policy vpnclient attributes
vpn-tunnel-protocol IPSec l2tp-ipsec
split-tunnel-policy tunnelspecified
split-tunnel-network-list value vpnclient_splitTunnelAcl
intercept-dhcp enable

tunnel-group DefaultRAGroup general-attributes
address-pool vpnclient
authentication-server-group ad_vpn
default-group-policy vpnclient
strip-realm
strip-group
tunnel-group DefaultRAGroup ipsec-attributes
pre-shared-key *****
tunnel-group DefaultRAGroup ppp-attributes
authentication pap
no authentication chap
no authentication ms-chap-v1

crypto ipsec ikev1 transform-set l2tp1 esp-aes esp-sha-hmac
crypto ipsec ikev1 transform-set l2tp1 mode transport
crypto ipsec ikev1 transform-set l2tp2 esp-aes esp-md5-hmac
crypto ipsec ikev1 transform-set l2tp2 mode transport
crypto ipsec ikev1 transform-set aes-256-l2tp esp-aes-256 esp-sha-hmac
crypto ipsec ikev1 transform-set aes-256-l2tp mode transport

crypto dynamic-map SYSTEM_DEFAULT_CRYPTO_MAP 65535 set transform-set l2tp1 l2tp2 aes-256-l2tp
no crypto dynamic-map SYSTEM_DEFAULT_CRYPTO_MAP 65535 set pfs

crypto isakmp nat-traversal 20

crypto ikev1 policy 5
authentication pre-share
encryption 3des
hash sha
group 2
lifetime 86400
crypto ikev1 policy 10
authentication pre-share
encryption aes
hash sha
group 2
lifetime 86400

crypto ikev1 enable outside


Installing FreeBSD on an existing ZFS pool

This post assumes that the zpool is using raw disks instead of partitions.
It is also assumed that the name of the existing zpool is pool0.

Start by booting the livecd and enter the shell.

Import the existing zpool:

# zpool import pool0


Create the new dataset for the root, and set the mountpoint to /mnt for the installation.

# zfs create pool0/ROOT
# zfs create -o mountpoint=/mnt -o canmount=noauto pool0/ROOT/FreeBSD
# zfs mount pool0/ROOT/FreeBSD

 
Fetch the installation files and install the distribution:

# cd /mnt
# fetch ftp://ftp.se.freebsd.org/pub/FreeBSD/releases/amd64/amd64/10.3-RELEASE/base.txz
# fetch ftp://ftp.se.freebsd.org/pub/FreeBSD/releases/amd64/amd64/10.3-RELEASE/kernel.txz
# fetch ftp://ftp.se.freebsd.org/pub/FreeBSD/releases/amd64/amd64/10.3-RELEASE/ports.txz
# fetch ftp://ftp.se.freebsd.org/pub/FreeBSD/releases/amd64/amd64/10.3-RELEASE/src.txz
# tar xvpf base.txz
# tar xvpf kernel.txz
# tar xvpf ports.txz
# tar xvpf src.txz
# cd /

 
Make the system bootable (change ada0 to your hdd):

# echo 'zfs_load="YES"' >> /mnt/boot/loader.conf
# echo 'zfs_enable="YES"' >> /mnt/etc/rc.conf
# zpool set bootfs=pool0/ROOT/FreeBSD pool0
# zfs unmount pool0/ROOT/FreeBSD
# zfs set mountpoint=/ pool0/ROOT/FreeBSD
# zpool export pool0
# sysctl kern.geom.debugflags=0x10
# dd if=/boot/zfsboot of=/dev/ada0 count=1
# dd if=/boot/zfsboot of=/dev/ada0 iseek=1 oseek=1024

 
Reboot and login as root, then change your password and do your usual configuration to /etc/rc.conf.

Remote management of PowerEdge 1950 servers without DRAC

Introduction

Using IPMI it’s possible to get some remote management features without having a DRAC card in the server. At least remote power control and serial over LAN are available.

Setting up IPMI using ipmitool:

Configure LAN

Change ip, netmask and defgw to match your network.

ipmitool lan set 1 ipsrc static
ipmitool lan set 1 ipaddr 10.1.2.3
ipmitool lan set 1 netmask 255.255.255.0
ipmitool lan set 1 defgw 10.1.2.1
ipmitool lan set 1 auth callback md5
ipmitool lan set 1 auth operator md5
ipmitool lan set 1 auth admin md5
ipmitool lan set 1 auth user md5
ipmitool lan set 1 access on
ipmitool lan set 1 arp respond on

# If needed configure vlan id
ipmitool lan set 1 vlan id 100

 
Configure users

ipmitool user set name 2 admin
ipmitool user set password 2 SecretPassword1
ipmitool user enable 2
ipmitool user priv 2 4 1
ipmitool user priv 2 4 2

# List enabled users
ipmitool user list 1
ipmitool user list 2

 
Enable serial over lan

ipmitool sol set privilege-level admin 1
ipmitool sol set force-encryption true 1
ipmitool sol set force-authentication true 1
ipmitool sol set non-volatile-bit-rate 57.6 1
ipmitool sol set volatile-bit-rate 57.6 1
ipmitool sol set enabled true 1
ipmitool sol payload enable 1 2

To connect to the serial over lan console use the following command:

ipmitool -I lanplus -H 10.1.2.3 -U admin -P SecretPassword1 sol activate

The serial console supports some escape sequences, which can be checked by typing ~?

Supported escape sequences:
~.  - terminate connection
~^Z - suspend ipmitool
~^X - suspend ipmitool, but don't restore tty on restart
~B  - send break
~?  - this message
~~  - send the escape character by typing it twice
(Note that escapes are only recognized immediately after newline.)

Examples of common operations

  • Reseting power over the network
  • ipmitool -H 10.1.2.3 -U admin -P SecretPassword1 chassis power reset
  • Blinking uid light
  • ipmitool chassis identify
  • Read sensors
  • ipmitool sensor

 
All except serial over lan should work on all servers with IPMI.
Serial over LAN requires IPMI 2.0.